

Scudata SPL Cloud Deployment
Overview
Scudata SPL Cloud (SSC) is an application that provides SPL computations and that can be deployed both on cloud virtual machine and in the local machine. The application automatically allocates tasks among SPL servers in its charge to execute the script file stored on the remote storage, which achieves cloud computing.
SSC consists of three parts – QVS, QVA and QVM.
QVM is SPL server that performs SPL computations by accessing remote storage services (such as S3), databases, local hard disks, or external libraries (such as ElasticsSearch, Kafka, MongoDB and Cassandra). To upload/download/debug data to/from/in S3, you can use esProc Enterprise edition’s remote debugging service. See detailed information in Deploy and Use RSRV in esProc Enterprise Edition.
QVA is the server that manages QVM servers. Each QVA manages a group of QVM servers and designates virtual machines to start up QVM after it responds to task performance request. There are two deployment models: public clouds and private clouds. The public cloud supports dynamic start and stop of QVM. The private cloud does not, and manual management is needed.
QVS is the multi-purpose server and needs to be deployed by users themselves. Users can configure multiple QVA servers on QVS, access the corresponding QVA server through verification string and request QVM to perform SPL computations. The QVS can also be deployed separately as a remote debugging server.
Cloud service deployment
This section illustrates how to deploy and use SSC.
The following will take private cloud deployment as an example and lead you quickly through the process of deploying SSC on user’s own third-party cloud platform virtual machine (EC2) and remote storage (S3).
Deployment environment:
| 192.168.1.4 | QVM |
| 192.168.1.5 | QVA |
| 192.168.1.6 | QVS |
Step 1: Deploying QVS application
esProc Enterprise edition installation package offers QVS project in【esProc installation directory】\esProc\q-server\webapps\qvs directory.
Continue the following operations if you need integrated deployment; otherwise, you can directly jump to the next step:
Integrate qvs directory under【esProc installation directory】\esProc\q-server\webapps into the WEB application.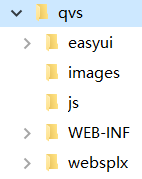
Then you also need to put jars in the following directories to the lib directory:
Ø 【esProc installation directory】\esProc\lib
Ø 【esProc installation directory】\esProc\q-extlib, which contains third-party jars of various remote storage services. Just get the jars used by the remote storage as needed. In this step, you need to put jars in s3 directory to QVS application’s lib directory. The remote storage jars are used to access data files or script files on the remote storage.
Note: Among all files in the two directories, only web.xml cannot be directly copied. You need to copy content of QVS’s web.xml file to the web.xml file in the application into which QVS will be integrated. Order of web.xml’s content should conform to rules of the corresponding application server.
Step 2: Deploying QVA application
esProc Enterprise edition installation package offers QVA project in【esProc installation directory】\esProc\q-server\webapps\qva directory.
Continue the following operations if you need integrated deployment; otherwise, you can directly jump to the next step:
Integrate qva directory under【esProc installation directory】\esProc\q-server\webapps into the WEB application.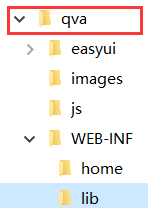
Then you also need to put jars in the following directories to the lib directory:
Ø 【esProc installation directory】\esProc\lib;
Ø 【esProc installation directory】\esProc\q-extlib, which contains third-party jars of various cloud virtual machines and remote storage services. Just get the jars used by the server cloud virtual machine and remote storage as needed. In this step, you need to put jars in ec2 directory and s3 directory to QVA application’s lib directory. The cloud storage jars are used in the QVA cloud storage logging functionality.
Note: Among all files, only web.xml cannot be directly copied. You need to copy content of QVA’s web.xml file to the web.xml file in the application into which QVA will be integrated. Order of web.xml’s content should conform to rules of the corresponding application server.
Step 3: Configuring QVS’s IP address and port number
esProc Enterprise edition provides built-in Tomcat sever. Configure IP address and port number in【esProc installation directory】\esProc\q-server\conf\server.xml (The port and host are what need to be configured):
<?xml version="1.0" encoding="UTF-8"?>
<Server port="8041" shutdown="SHUTDOWN">
…
<Service name="Catalina">
<Connector port="8090" protocol="HTTP/1.1"
connectionTimeout="0"
/>
<Engine name="Catalina" defaultHost="localhost">
…
<Host name="192.168.1.6" appBase="webapps"
unpackWARs="true" autoDeploy="false"
deployXML ="false" deployOnStartup ="false" >
<Valve className="org.apache.catalina.valves.AccessLogValve" directory="logs"
prefix="localhost_access_log" suffix=".txt"
pattern="%h %l %u %t "%r" %s %b" />
<Context path="/qvs" docBase="qvs" reloadable="true" privileged="true"> </Context>
</Host>
</Engine>
</Service>
</Server>
Skip this step for integrated deployment, and just use the IP address and port number of the current server.
Step 4: Configuring QVA’s IP address and port number
esProc Enterprise edition provides built-in Tomcat sever. Configure IP address and port number in【esProc installation directory】\esProc\q-server\conf\server.xml (The port and host are what need to be configured):
<?xml version="1.0" encoding="UTF-8"?>
<Server port="8041" shutdown="SHUTDOWN">
…
<Service name="Catalina">
<Connector port="8090" protocol="HTTP/1.1"
connectionTimeout="0"
/>
<Engine name="Catalina" defaultHost="localhost">
…
<Host name="192.168.1.5" appBase="webapps"
unpackWARs="true" autoDeploy="false"
deployXML ="false" deployOnStartup ="false" >
<Valve className="org.apache.catalina.valves.AccessLogValve" directory="logs"
prefix="localhost_access_log" suffix=".txt"
pattern="%h %l %u %t "%r" %s %b" />
<Context path="/qvs" docBase="qvs" reloadable="true" privileged="true"> </Context>
</Host>
</Engine>
</Service>
</Server>
Skip this step for integrated deployment, and just use the IP address and port number of the current server.
Step 5: Configuring esProc serial number
Configure serial number for QVS and QVA.
QVS configuration file:【esProc installation directory 】/esProc/q-server/webapps/qvs/WEB-INF/home/raqsoftConfig.xml
QVA configuration file:【esProc installation directory】/esProc/q-server/webapps/qva/WEB-INF/home/raqsoftConfig.xml
<?xml version="1.0" encoding="UTF-8"?>
<Config Version="3">
    <Runtime>
        ...
        <Esproc>
          ...
			<serialNo>CAKSXV8GUK66X</serialNo>
          ...
        </Esproc>
        ...
    </Runtime>

</Config>
Step 6:Configuring QVS
Set QVS operation mode as 0 (service) and configure user’s remote storage address.
Configuration file:【esProc installation directory】/esProc/q-server/webapps/qvs/WEB-INF/home/qvsConfig.xml (The blue properties are what need to be configured):
<?xml version="1.0" encoding="UTF-8"?>
<qvs>
<runMode>0</runMode>
<locale language="en" country=""/>
<cacheSystem cachePath="cache" blockSize="1024" minFreeSpace="2" />
<verifies>
<verify code="demoqvs">
<qva user="admin" xpwd="88888888" url="http://192.168.1.5:8090/qva"/>
<store type="S3">
{"region":"us-east-2","accessKey":"AKIAVSPDUYZ7O7WTX3C2","secretKey":"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","endPoint":"https://s3.us-east-2.amazonaws.com"}
</store>
</verify>
</verifies>
</qvs>
Property description:
runMode: QVS operation mode. Set it as 0, which represents service, or 1, which is debugging, as needed. Installation package offers 1 (debugging mode) by default. See Deploy and Use RSRV in esProc Enterprise Edition to learn how to deploy and use the debugging mode.
locale: The language used in the QVS application.
cacheSystem: Configurations of downloading user files from the remote storage service provider to QVS; valid only for debugging mode. Here it is ignored.
cachePath: The directory recording file downloading information.
blockSize: Specify the size of each downloaded block.
minFreeSpace: The minimum free space for storing the downloaded file directory; when the available server disk space is less than the specified minimum free space, buffered files under the download directory will be automatically deleted.
verifies: Configurations related to validation; multiple match pairs are allowed. qva and store information will be matched according to verification string at connection to QVS.
code: Verification string. Use a complex one to ensure higher safety.
qva: User name, execution password and URL for accessing QVA application. You can configure any user registered on QVA administration interface; default admin count is admin/88888888.
store: Configurations related to the remote storage; used to read remote storage data files or script files. With QVS service mode, store is QVA users’ remote storage information, with QVS debugging mode, store is the debugger’s remote storage information.
type: Storage service provider type (S3, GCS, NFS, Azure, HDFS, Mount). The content between tags is remote storage user information on QVS. The example uses S3’s user information format. Need to configure as user’s own remote storage address.
Step 7: Configuring QVA
Configuration file:【esProc installation directory】/esProc/q-server/webapps/qva/WEB-INF/home/qvaConfig.xml (The blue properties are what need to be configured):
<?xml version="1.0" encoding="UTF-8"?>
<qva>
<runMode>1</runMode>
<locale language="en" country=""/>
<vmConfig protocol="http" port="8081" type="EC2">
<!—Set server address; ignore this setup for proprietary mode -->
{"region":"us-east-2","accessKey":"AKIAVSPDUYZ7O7WTX3C2","secretKey":"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","endPoint":"https://s3.us-east-2.amazonaws.com"}
</vmConfig>
<vmMonitor interval="30" minQvmNum="0" maxIdleTime="300" connectPackingRatio="50" />

<store type="S3">
{"region":"us-east-2","accessKey":"AKIAVSPDUYZ7O7WTX3C2","secretKey":"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","endPoint":"https://s3.us-east-2.amazonaws.com"}
</store>
<waitVMTime>30</waitVMTime>
<onlineMonitor interval="10" maxIdleTime="120" manageTimeout="1200"/>
<checkVMStatus timeout="1500"/>
<sendMail user=" " pwd=" " smtp=" " from=""/>
</qva>
Property description:
runMode: QVS operation mode. Set it as 0 for public cloud, which starts/stops QVM automatically, or 1 for private cloud, which starts/stops QVM manually. esProc Enterprise edition’s installation package offers 1 (private cloud) by default.
locale: The language used in the QVA application.
vmConfig: VM property configuration; used to match VM instances.
protocol: The protocol for accessing a QVM instance, which is http or https.
port: The port through which a QVM instance is accessed.
type: Server type a QVM instance uses (EC2, GCE or local); case-insensitive. Default type for esProc Enterprise edition’s built-in QVM is “local”, which represents the local server;
Server address {} is invalid for the private cloud, and the property can be ignored.
vmMonitor: VM monitor configuration; need not to configure for private cloud.
interval: Time interval during monitoring specified for QVM monitor application; unit is second.
minQvmNum: The minimum number of started QVM servers.
maxIdleTime: The maximum idle time for QVM server; automatically close the server at timeout; unit is second.
connectPackingRatio: The number of waiting requests/ the number of QVM started QVM servers. Automatically begin to start QVM when the request accumulation rate exceeds a certain threshold value until all configured QVM servers are started.
store: Configure remote storage information for the administrator; used for task log and VM log backup.
type: Storage service provider type (S3, HDFS, GCS, NFS, Azure, OSS, Mount). The content between tags is remote storage user information on QVA. The example uses S3’s user information format. Need to configure as administrator’s own remote storage address; can share the remote storage with QVS.
waitVMTime: When a user tries to connect to QVA and if all QVM servers are occupied, the user will wait in a queue. The property specifies the default wait time; the system will return timeout error when the specified time is over.
onlineMonitor: Online monitoring settings.
Interval: The time interval between online connections to the monitor; default is 10 seconds;
maxIdleTime: The default maximum QVM connection idle time; when no value is specified for parameter lt in Qconnect function, use this default value, which is 120 seconds;
manageTimeout: After the user logs on a WEB page, it will automatically log out if no operations occur during this time period, which by default is 1200 seconds.
checkVMStatus: QVA checks the status of QVM instance.
timeout: Time out for getting the check result (unit: milliseconds) ; default value is 1500;
sendMail: Use email to reactivate the password reset process. Click “Forget password” button on the login page, and the system will send a reactivation mail to the email address used for registering the account. Then you click the URL in the mail and log on the administration page to set a new password.
user: Name of the user to whom the email is sent;
pwd: The password for sending the mail;
smtp: The sever IP from which the mail is sent;
from: The displayed name of the email address from which the mail is sent.
Step 8: Starting QVS/QVA server
QVS: Start the built-in Tomcat server in esProc Enterprise Edition at IP 192.168.1.6. The startup file is StartQVS.bat (StartQVS.sh for Linux) located in 【esProc installation directory】\esProc\ bin. Launch the corresponding server for the integrated deployment.
QVA: Start the built-in Tomcat server in esProc Enterprise Edition at IP 192.168.1.5. The startup file is StartQVA.bat (StartQVA.sh for Linux) located in 【esProc installation directory】\esProc\ bin. Launch the corresponding server for the integrated deployment.
Step 9: Deploying QVM application
Each QVA manages a group of QVM servers. Here we’ll take one QVM server as an example to illustrate QVM deployment. Deploying multiple QVM servers requires consistent vmConfig configurations for QVM under the same QVA server.
esProc Enterprise edition installation directory offers QVM project under【esProc installation directory】\esProc\qvm. To quickly deploy QVM, just install the Enterprise edition on the server.
QVM application directory: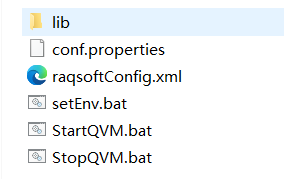
conf.properties: QVM configuration file
StartQVM.bat /StartQVM.sh: For starting QVM
StopQVM.bat /StopQVM.sh: For exiting QVM
raqsoftConfig.xml: Data source and main directory configuration file
lib: The package file to be loaded by QVM; should copy all jars, except for ecloud-******.jar and javax.servlet-api***.jar, in【esProc installation directory】\esProc\lib into【esProc installation directory】\esProc\qvm\lib. To read data files or script files in the cloud storage, you need to copy the third-party jars corresponding to the cloud storage type to【esProc installation directory】\esProc\qvm\lib. In this step you also need to put the jars in s3 directory in【esProc installation directory】\esProc\q-extlib to QVM’s lib directory.
Step 10: Configuring QVM
Configuration file:【esProc installation directory】/esProc/qvm/conf.properties
#[customer]
cloud.start.home=
cloud.qvs.url=none
cloud.qva.url=http://192.168.1.5:8090/qva
server.port=8081
cloud.qvm.store.cachepath=
cloud.qvm.store.blocksize=
cloud.qvm.store.minfreespace=
#[system]
… …
… …
Property description:
cloud.start.home:QVM working directory; default is【esProc installation directory】/esProc/qvm.
cloud.qva.url:Address of accessing the QVA application.
server.port: The port number used by QVA in monitoring QVM; need to be consistent with the port specified in vmConfig in QVA configuration file.
cloud.qvm.store.cachepath: Record the cache path to which the user files downloaded from the remote storage service are stored.
cloud.qvm.store.blocksize: Specify the storage block size.
cloud.qvm.store.minfreespace: The minimum free space in the directory storing the downloaded files. When the available space is less than the specified minimum free space, cached files in this directory will be automatically deleted.
Step 11: Configuring esProc serial number
Configure serial number for QVM.
QVM configuration file:【esProc installation directory】/esProc/qvm/raqsoftConfig.xml
<?xml version="1.0" encoding="UTF-8"?>
<Config Version="3">
    <Runtime>
        ...
        <Esproc>
          ...
			<serialNo>CAKSXV8GUK66X</serialNo>
          ...
        </Esproc>
        ...
    </Runtime>

</Config>
Sterp12 :Starting QVM
Start StartQVM.bat (StartQVM.sh for Linux) under【esProc installation directory】\esProc\qvm.
Step 13: Adding QVM instance to QVA
Enter QVA administration page: http://192.168.1.5:8090/qva/login.jsp: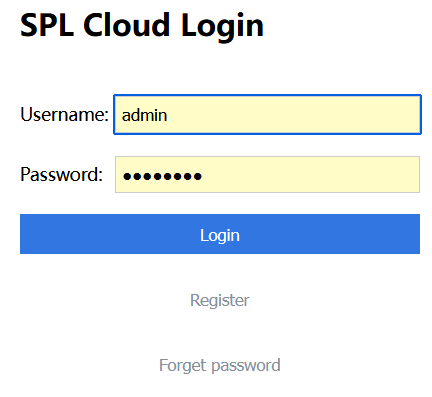
Here we log in as the admin (Default password for admin is 88888888), enter the QVA administration page, click “Instance Manage” and add an instance. You can click “Refresh List” button to view operation status of the instance: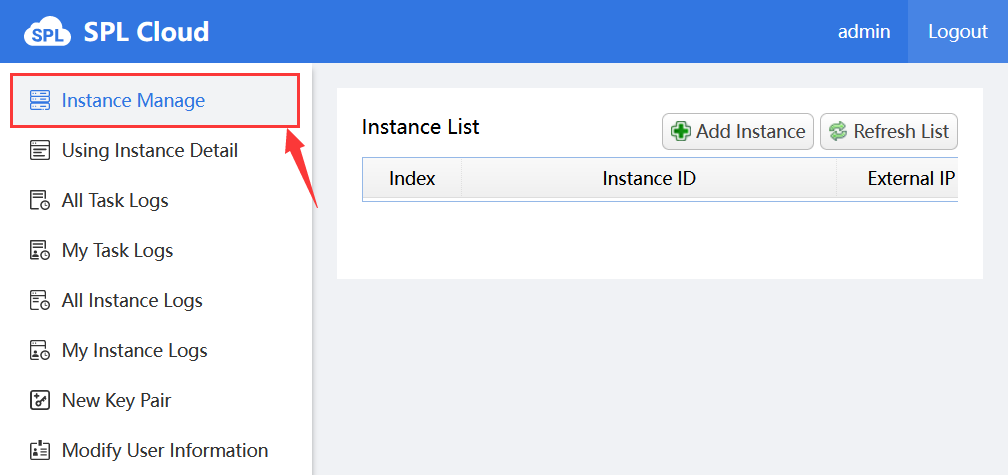
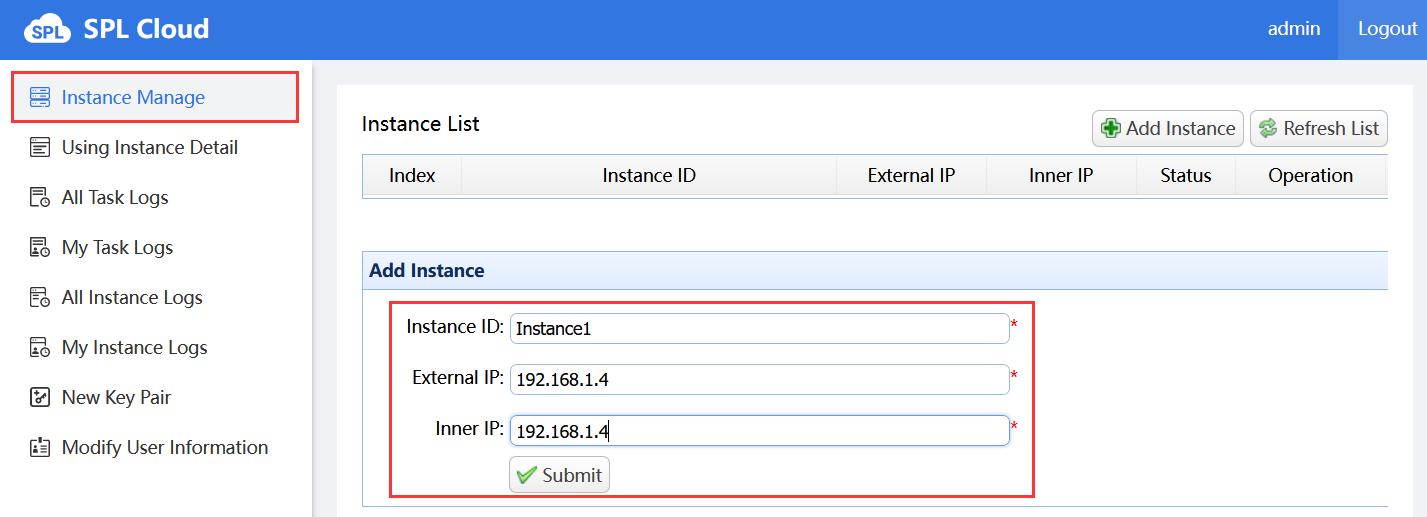
Instance ID: QVM instance name; when QVM instance’s server type is cloud virtual machine, the Instance ID should be same as the cloud platform’s instance ID.
External IP: External IP address; valid when the “type” property explained in Step 7: Configuring QVA is local. Ignore the property for other cloud platform types.
Inner IP: Internal IP address.
Enter the qvm instance started in Step 12: Starting QVM, and click “Submit”.
The public cloud dynamically starts and stop QVM, keeping a certain number of idle QVM servers. To set the ratio of started QVM and stopped QVM, see vmMonitor description in Step 7: Configuring QVA.
The private cloud model does not need dynamic start/stop. All QVM servers are in start status.
Following shows uses of menu items on the QVA administration page. Jump toStep 14: Executing remote storage script file if you do not need them:
Using Instance Detail: Detailed information of instances in use.
All Task Logs: View logs of all tasks. The item lets you look up all task logs of admin and the other users.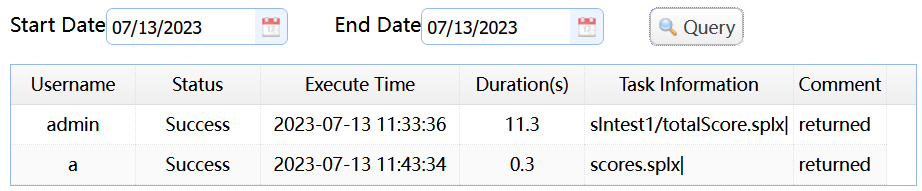
My Task Logs: View logs of my task. It lets you look up task logs of the currently logged in user.
All Instance Logs: View logs of all instances. It lets you look up logs of all instances of the admin and other users.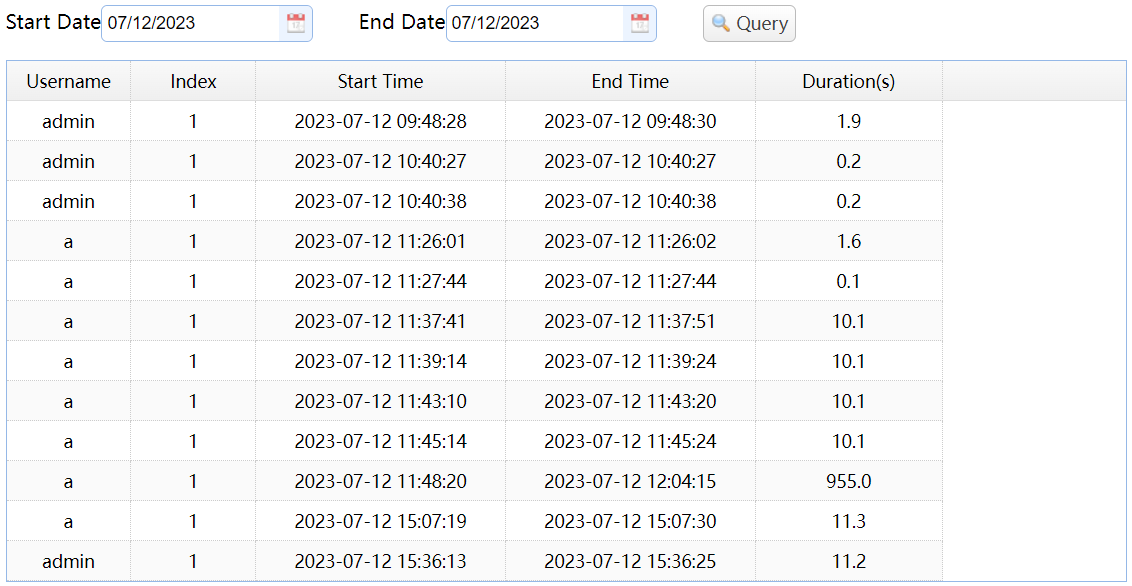
My Instance Logs: View logs of my instance. It lets you look up instance logs of the currently logged in user.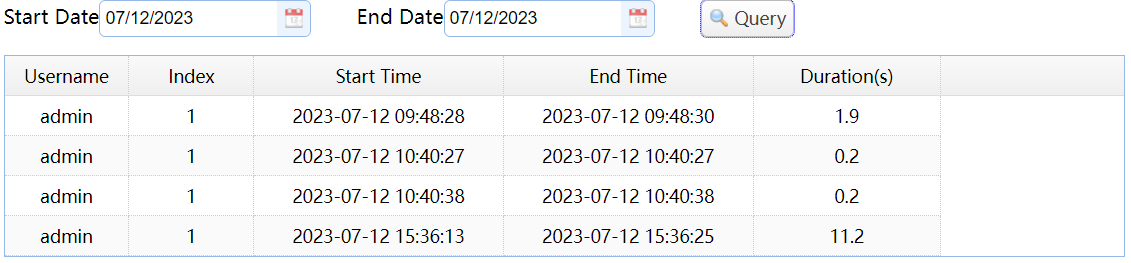
New Key Pair: Generate a new key pair for the administrator.
Modify User Information: Modify user’s information.
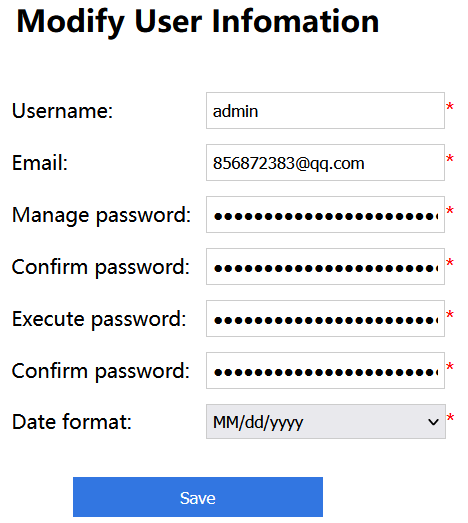
If it is information of the user involved in QVA connection explained in Step 5: Configuring QVS that you have modified, change the qvsConfig.xml configuration file accordingly.
To register as a general user, click “Register” button on the login page: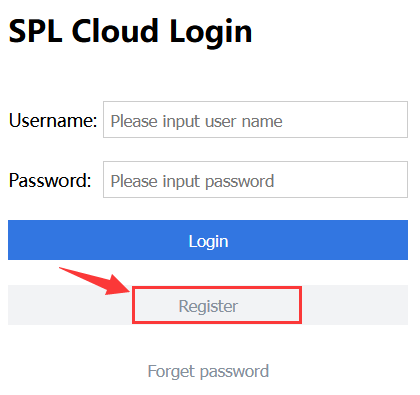
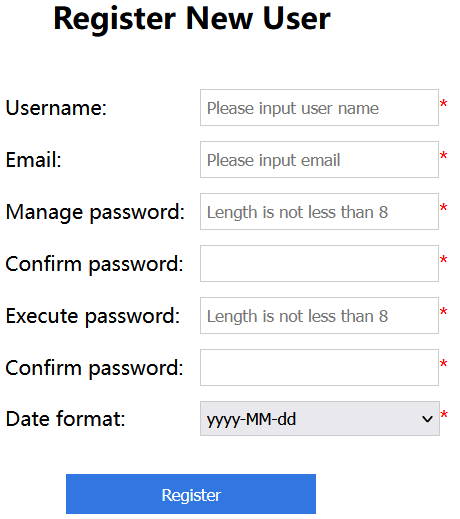
Username: User name
Email: Email address
Manage password: Administrator password
Confirm password: Confirm password
Execute password: Execution password; used to configure QVA password in qvsConfig.xml
Confirm password: Confirm password
Date format: Date format, which should be consistent with the date control format displayed in the current QVA application; used to display and parse dates in instance management.
If you forget the password, click“Forget password" button on the login page and the system will send a reactivation mail to the email address used for registering the account (sendMail configured in qvaConfig.xml). The length of time the activation link is valid is 15 minutes. Then you click the URL in the mail and log on the administration page to set a new password.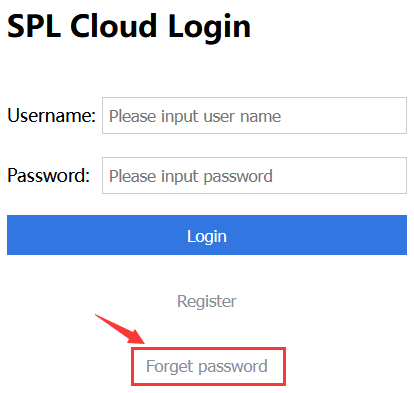
Step 14: Executing remote script file
Now we have finished deploying QVS, QVA and QVM through the above steps. Next, the remote storage script file in IDE will be called and computing tasks are sent from QVS to QVA, which responds to and distributes tasks to QVM servers to perform cloud computing.
1. Upload script file totalScore.splx and data file score.ctx to slntest1 bucket on S3 remote storage using remote debugging. Reference qvsConfig.xml to configure remote storage.
Below is content of the script file:
totalScore.splx: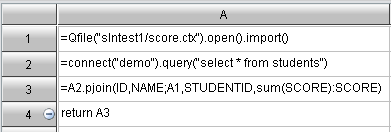
Compute each student’s total score and return the query result.
score.ctx:
2. Configuring data source
Copy data source driver jar hsqldb-***.jar in【esProc installation directory】\common\jdbc to QVM application’s【project directory】\lib.
Configure data source in QVM application’s【project directory】\raqsoftConfig.xml:
<DBList>
<DB name="demo">
<property name="url" value="jdbc:hsqldb:hsql://127.0.0.1/demo" ></property>
<property name="driver" value="org.hsqldb.jdbcDriver" ></property>
<property name="type" value="13" ></property>
<property name="user" value="sa" ></property>
<property name="password" ></property>
<property name="batchSize" value="1000" ></property>
<property name="autoConnect" value="true" ></property>
<property name="useSchema" value="false" ></property>
<property name="addTilde" value="false" ></property>
<property name="dbCharset" value="UTF-8" ></property>
<property name="clientCharset" value="UTF-8" ></property>
<property name="needTransContent" value="false" ></property>
<property name="needTransSentence" value="false" ></property>
<property name="caseSentence" value="false" ></property>
</DB>
</DBList>
You can also use the two steps to configure other databases.
Note: Put corresponding database driver jars to a classpath that QVM can load when trying to connect to the data source. The built-in database type to which the demo data source in esProc installation package connects is HSQL, and its driver jar is hsqldb-2.7.3-jdk8.jar. The driver jar is located in【esProc installation root directory】\common\jdbc, which by default contains drivers of commonly used databases, such as Oracle, MySQL and SQL Server. Users need to choose the corresponding drivers as needed.
-
Starting database
Start startDataBase.bat (startDataBase.sh for Linux) in QVM server’s【esProc installation directory】\esProc\bin. -
Open esProc Enterprise edition IDE and call the remote storage script file.
You can log in QVA administration page to view task performance process and status. Below is task performance log:A
B
1
=Qconnect("http://192.168.1.6:8090/qvs":"demoqvs",10,30)
//Request QVA to access QVM through QVS started in Step 7
2
=A1.exec@x("slntest1/totalScore.splx",100)
//Execute totalScore.splx in storage bucket slntest1, and get the return value
![]()
Click Using Instance Detail to view instance handling process during the execution.
SSC not only offers functions to perform operations on files in remote storage, such as upload, download and delete, but allows setting up global variables on QVS server or implementing global through QVS. Find more functions in esProc Function Reference.Special cloud platform configurations
Google Compute Engine
1.Server type: GCE; Address format:
{“credentials”:“scudata-891de5fb1bc3.json”,“project”:“scudata”,“zone”:“us-west2-a”}2.SSP: GCS; Address format:
{“credentials”:"scudata-891de5fb1bc3.json"}Note: The JSON file is generated when the user creates their Google account. Content of the JSON file is information of connecting to the Google Cloud Storage. If JSON needs to use GCS remote storage service, deploy the JSON file in the cloud service, during which both absolute path and relative path are supported. When QVS uses the remote storage, the relative path configured in credentials is relative to qvs\WEB-INF\home directory; when QVA uses the remote storage, the relative path configured in credentials is relative to qva\WEB-INF\home directory.
Network File System
1.SSP: NFS; Address format:
{“hostName”:“192.168.1.3”,“nfsPath”:“/mnt/share”,bCacheEnable:true}
bCacheEnable: Enable cache functionality; default value is false, which means no caching. The property only supports proprietary mode.Microsoft Azure
- SSP: Azure; Address format:
{“accountName”:“test1”,“accountKey”:“MSU9nLvFd+uasww8EtB45GzJ8eeg2FzFXhBb6lfaJ8l5kk0PVsgrc1KUyQN+tj3JyazSkutHuxKL+AStMuU3UA==”,“endPoint”:“core.windows.net”,“protocol”:“https”}
Hadoop Distributed File System
- SSP: HDFS; Address format:
{“urlName”:“hdfs://192.168.1.23:9000/”,“userName”:“root”,rootPath:“/hdfs”,bCacheEnable:true}
urlName/username: HDFS URL/username.
rootPath: Set the root directory, which is a relative path when it is convenient to read the remote storage file.
bCacheEnable: Enable cache functionality; default value is false, which means no caching. The property only supports proprietary mode.
Object Storage Service
1.SSP: OSS; Address format:
{“accessKey”:“LTII5tRgzS8Ns2arNpjU73Wt”,“secretKey”:“4dSAtbejF6arKpfJjUAxhO26JGaytM”,“endPoint”:“http://oss-cn-beijing.aliyuncs.com”}Mount
1.SSP: Mount; Address format:
{“rootPath”:“/mnt”}
rootPath: Set the root directory, which makes it convenient to use a relative path when reading remote storage files. - SSP: Azure; Address format:

SPL Official Website 👉 https://www.scudata.com
SPL Feedback and Help 👉 https://www.reddit.com/r/esProcSPL
SPL Learning Material 👉 https://c.scudata.com
SPL Source Code and Package 👉 https://github.com/SPLWare/esProc
Discord 👉 https://discord.gg/2bkGwqTj
Youtube 👉 https://www.youtube.com/@esProc_SPL


Chinese version